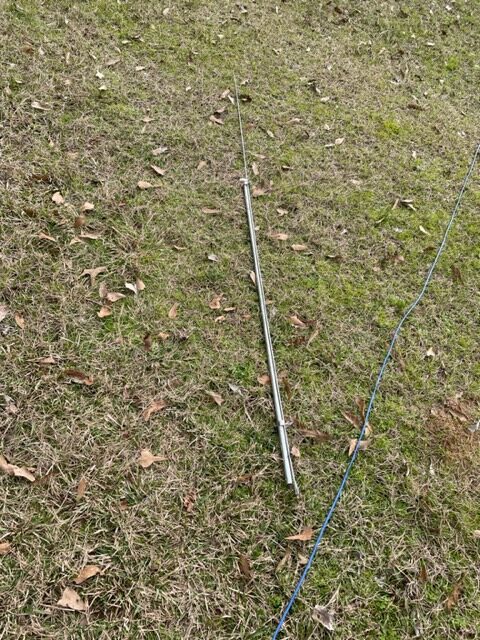
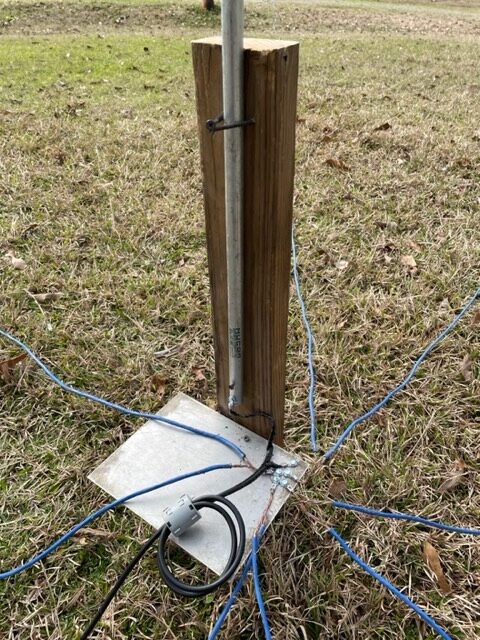
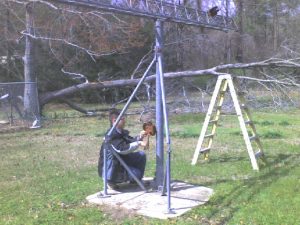
1/21/2023 – This morning I quickly built a 1/4 wave vertical for 15 meters, and the ability to add a stinger for the antenna to function on 20 meters. The antenna is for the exclusive use of the S & P station C which is interlocked with run station B.
The vertical is cross polarized with the yagis on the main tower, so this helps reduce in-band interference.
KD5YS was the exclusive operator today for S&P, and in the first 7 hours of the contest, this antenna and setup added 12% to our total QSO count.
1/4 wave vertical for 15 metersStinger to extend vertical to work on 20 metersQuick and easy tilt base with radial plate
The antenna is 1/2″ EMT. The tilt base is a 2×4 stake driven in the ground, with 3-inch drywall screws serving as the pivot and to keep the pipe vertical. I had some scrap CAT5 cable. I burned 3 inches of the insulation off the ends, cleaned the bare wire in a vinegar and salt solution, then soldered 2 cables into 1 of 4 ring terminals, for a total of 8 random length radials laying on the ground.
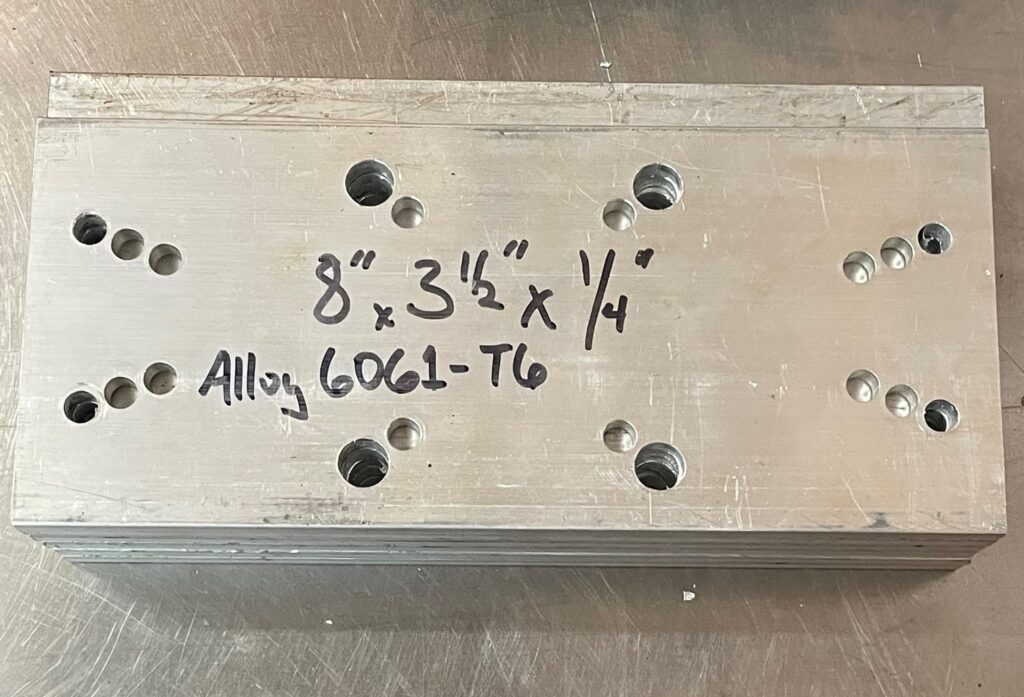
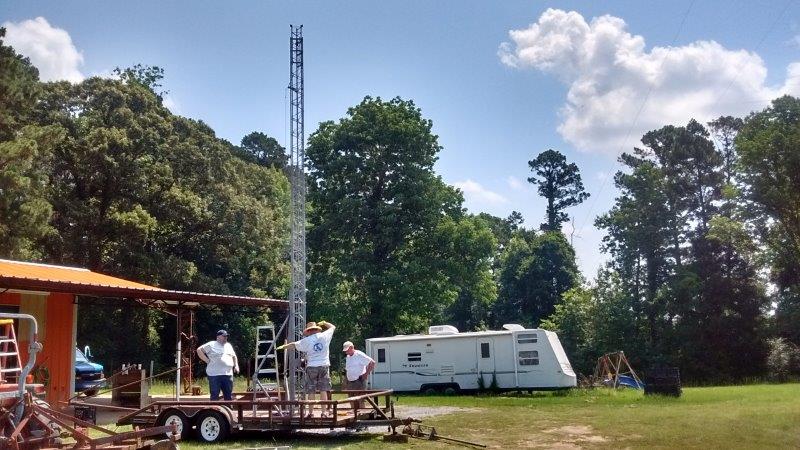
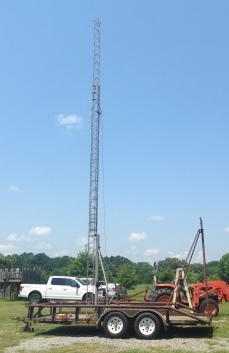
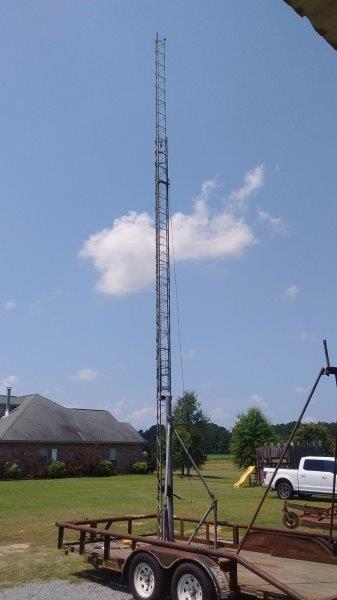
I’ve had tower sections, EHS, turnbuckles, guy brackets, etc on hand for several years with the desire to erect another tower in the 120-170 foot range. My biggest obstacle has been how to handle a set of guy wires that must cross a driveway. A viable option is to install a guy post. Finding a cost effective steel member has been challenging. But recently I did stumble upon a great deal on some 8″x8″x1/2″ H-beams 21 feet long. With this find, the last obstacle is overcome.
Three H-beams, each 21 feet longSome of the available hardware as of January 2023
Now it is time to get to work on the planning and designing the tower, antennas, and so on. My initial thoughts are to set this tower with stand alone antennas to allow in-band search and pounce concurrent with operations on the primary tower.
A wish list of antennas
Two or three Force 12 C-31XR
One or two Cushcraft XM-240
2-3 element 30-meter yagi, 24-30 foot boom
OWA monobanders for 10, 15, 20; booms up to 48 feet
I also have possession of a pair of KT-34 and a pair of KT-36 tribanders – only one has the M2 machined aluminum upgrades as yet.
What thoughts do you have? How would you design and populate this tower? Please comment below.
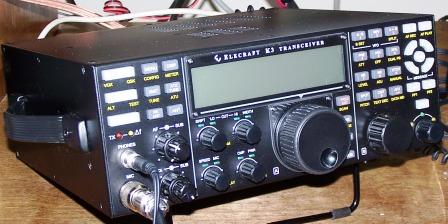
I have been trying to setup up the K3 and Mumble to enable proper audio for remote operation. The issue encountered was at the remote location, microphone input was being played back into my ears with the round trip induced latency, essentially “jamming” my ability to speak coherently.
Thanks to an email with the exact solution from Kazu M0CFW, M5Z, JK3GAD, I have figured it out! K3 LIN OUT has a TX MON setting that was added later than my printed user manuals (K3 # 251, so it has been around a while).
K3 MCU 5.58 / DSP 2.88 / FPF 1.26, 3-16-2017
* PREAMP 2 (ON KXV3B) NOW USABLE ON 15 AND 17 M: PREAMP 2 improves noise figure by about 6 dB on 15 m and 3 dB on 17 m relative to PREAMP 1.
* TX LINE OUT (MONITOR) LEVEL NOW ADJUSTABLE: In CONFIG:LIN OUT menu entry, tap ‘2’ (REV switch) to set the “T=” level (TX monitor). Tap ‘2’ again to return to the RX LINE OUT setting
K3 documentation and software update
All three of my K3 had TX MON = 30. Adjust to 0, Mumble problem 100% resolved!
I remember now that this was set to provide ability to record N1MM voice keyer messages on the fly! Because I didn’t remember, I’ve made notes in the config matrix of all my K3 manuals.
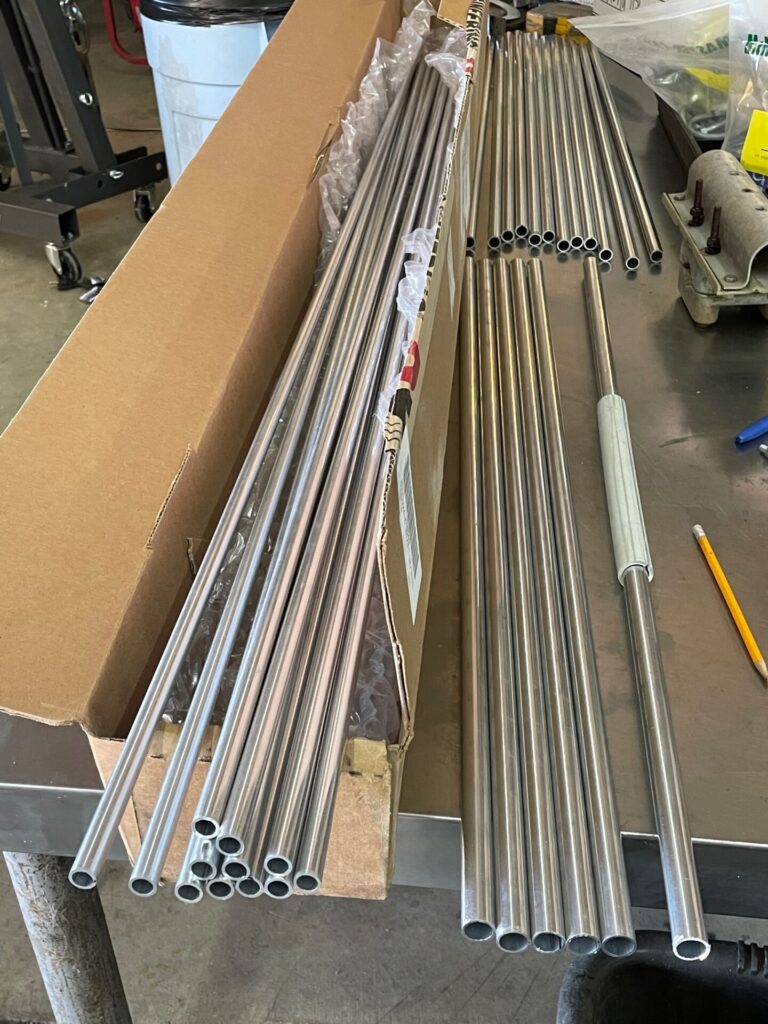
3/27/2022 – With a box of shiny tubing from DXE, and an OWA design from my friend, I tackled an antenna construction project today.
Shiny tubing for tower bling!
Since selling my Lightning Bolt 2-element 5-band cubical quad a few years ago, I have not had an antenna for 12 meters. My DXCC count is low on that band, so I figured that with the uptick in propagation, now is as good a time as any to tackle this project.
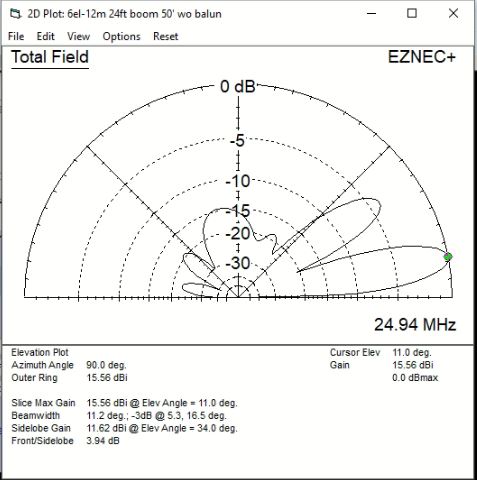
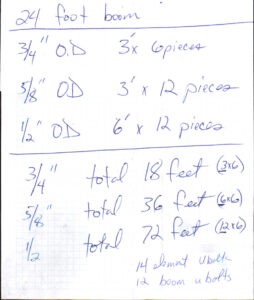
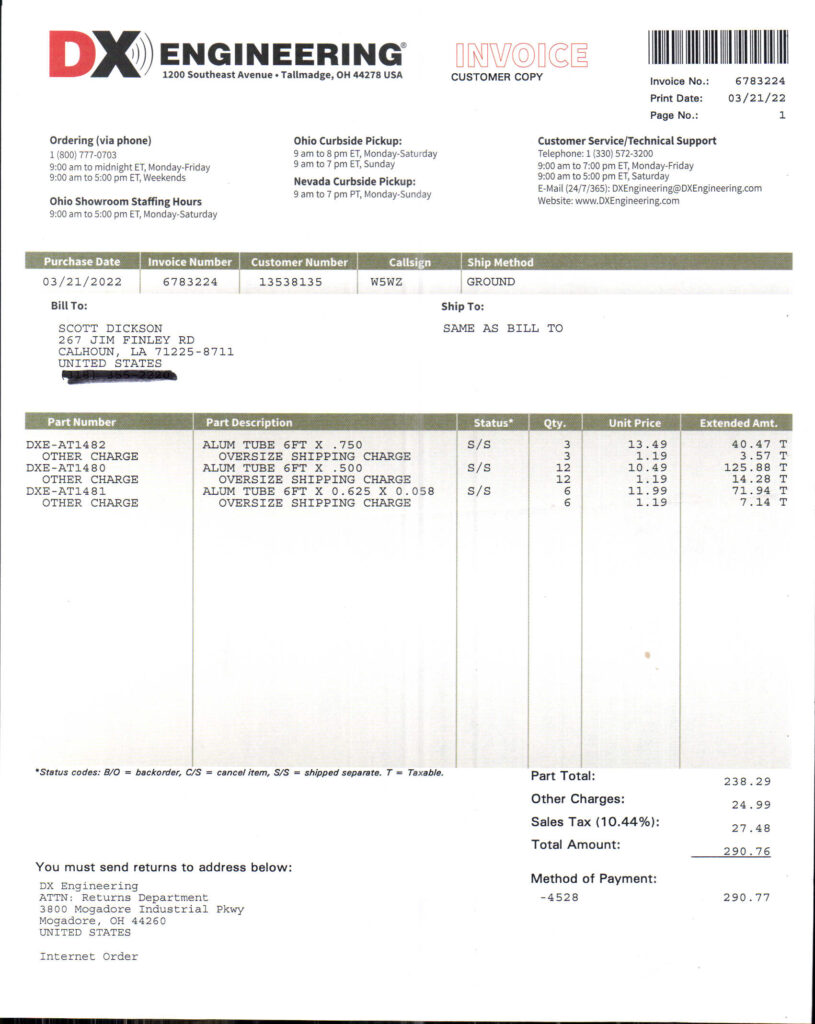
Some time ago I asked around for an OWA design to use a 24-foot boom (salvaged from an old TH6?). Once I had the design in hand, I plugged it into EZNEC 6.0, and agreed with the designer’s conclusions. Download my EZNEC file for this antenna. I made a parts list and placed an order from DXE for the tubing (surely there are others suppliers around, but I can’t find them using Google search) and another from McMaster-Carr for the hardware needed.
With some aluminum flat bar cut to length, a drill press made quick work punching holes in the boom-to-element plates (I used a DXE model as a template).
A pile of shavings!
Stack of six boom-to-element plates
The Sawzall was employed to cut the tubing to the needed lengths, followed by a thorough deburring of all tubing ends. Measured and marked the “exposed” lengths of tubing, inserted to the marks, and drilled three 1/8″ holes for pop rivets. Pulled the tubing out, deburred the drilled holes, then coated the insertable tip with a copper-impregnated anti-seize compound. Aligned the holes and riveted the tubing together. The halves of the driven element are separated by 2-inches, supported by a 0.75″ fiberglass rod inserted into both halves.
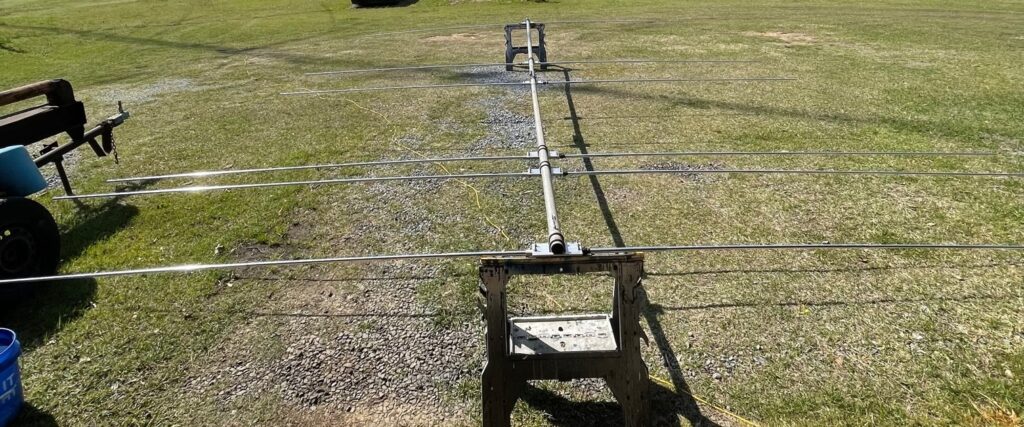
With the elements assembled, I moved outdoors to assemble the boom and install the boom-to-element plates. After that, installing the elements was a piece of cake.
This perspective doesn’t present the antenna well
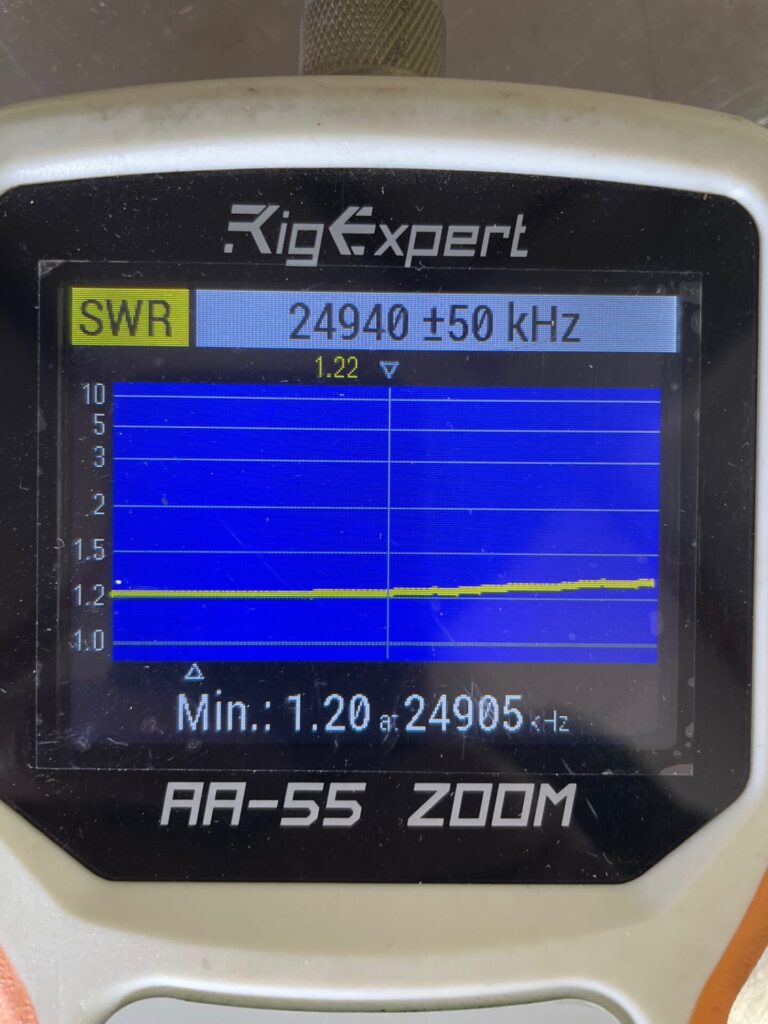
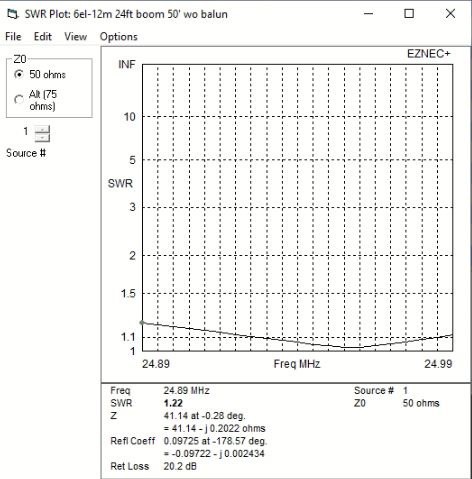
Still sitting on sawhorses, the initial SWR and R,X sweeps are nearly identical to the EZNEC model, and this is direct-feed.
Initial sweep still sitting on sawhorsesEZNEC 6.0 model’s SWR curve
I’ll update this post when the antenna is in service. I think it is going to be a flamethrower!
EZNEC 6.0 modeled pattern
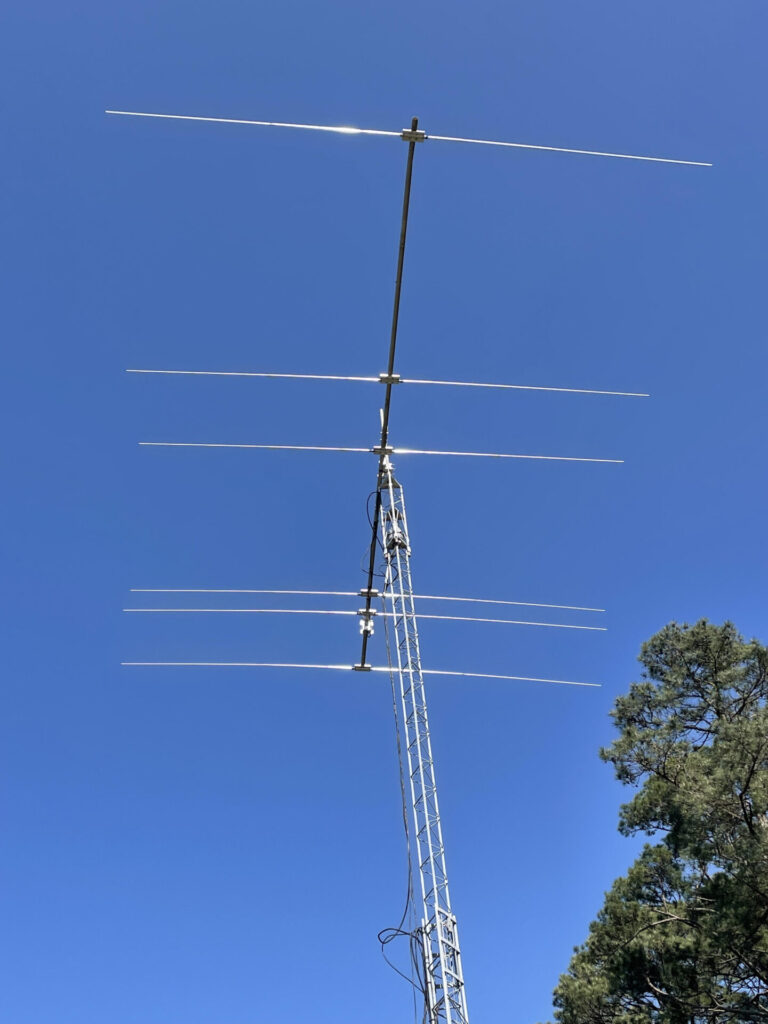
4/15/2022 – Good Friday, and good Friday! I was off work. Woke up at 0400 and was wide-awake. Decided today was a good day to install the antenna. So, working alone with tractor and pallet forks, along with an 8-foot ladder, I was able to remove the KT-34 and install the 12-meter yagi. Initial tests are promising – worked YV4 and VP2V right away, 100 watts CW.
4/15/22 – 12-meter yagi now flying at 50 feet
A comparable commercially build yagi is the M2 12M4DX which is priced at $1,908.95.
The parts list
I used a Balun Designs Model 1115t – 1:1 Isolation – Suppression Balun at the feed point, cost to my door about $65.
Aluminum isn’t cheap, but this beats buying a commercially built antenna
A year ago I wrote about my Christmas 2018 “self-gift”, the pair of JBL Control 2P powered monitor speakers that I integrated into my shack with a Mackie 1202-VLZ Pro. This continues to be enjoyed in my shack because I can listen to multiple sources without being tethered by a headset cord.
Similarly, I’ve been tethered by headset cord to all my microphones because they are all headset mikes. For some time, I had desired an articulating boom + microphone setup. However, I did not want to pay for brand new equipment just to try something out, and I wasn’t really sure how or where I would mount it to not be in the way when not using it.
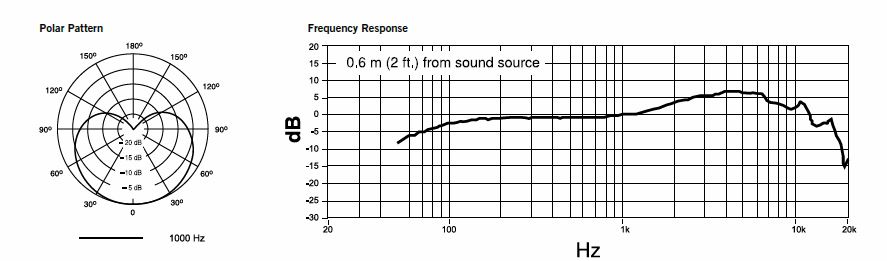
I had read on the Elecraft reflector some interesting commentary about brands of microphones. As the K3 has a built-in transmit equalizer, it seemed the consensus leaned away from the brand that is marketed as the elite microphones for ham radio. I studied some other brands and the frequency response and cardioid patterns of several microphones.
Shure PGA 48 response charts
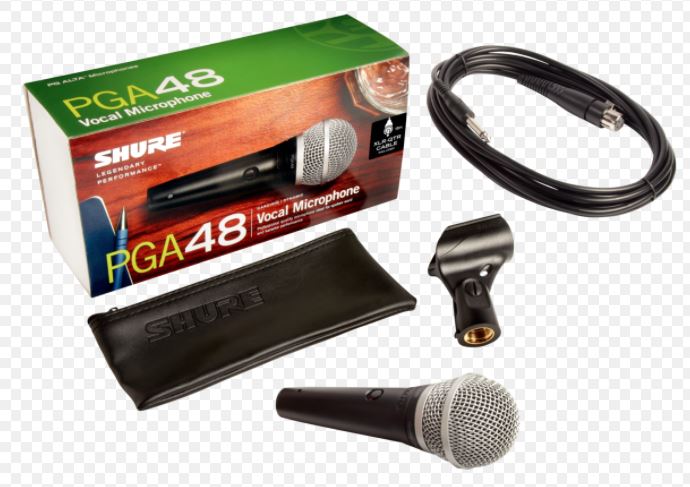
Soon, I found one that I was willing to buy and try. I found a new condition, open box Shure PGA48 with a 15-ft XLR cable and mic clip on eBay for $33 to my door.
What’s in the box.
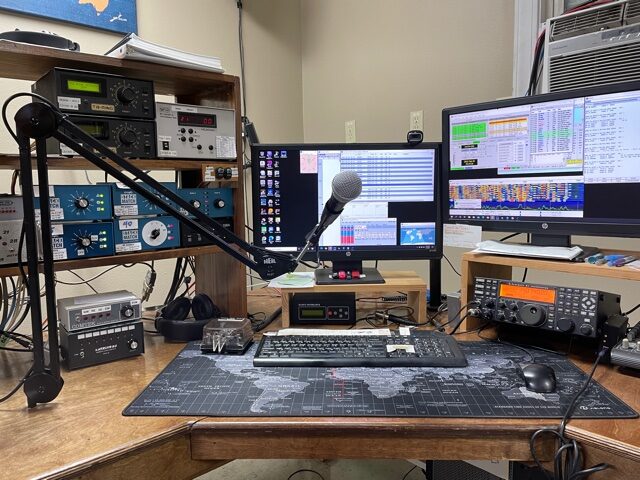
At the same time on eBay, I found a used mic boom, Heil PL2 missing the cable covers and any type of mount, for $50 to my door. Tiny zip ties will hold the cable just fine.
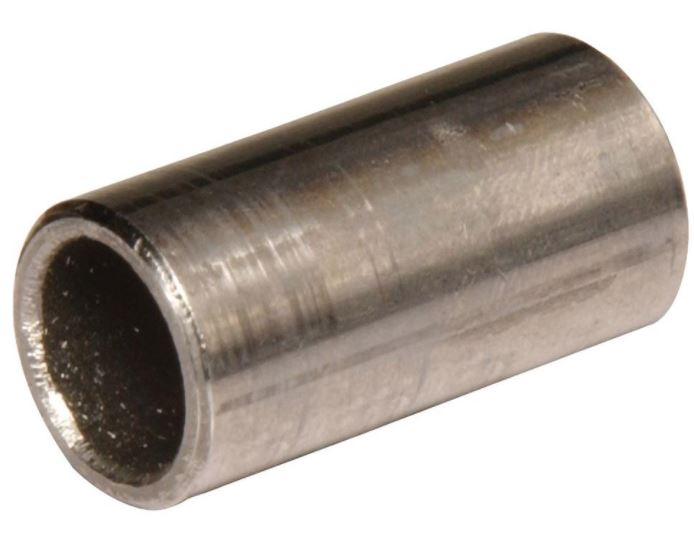
The items arrived, and I was left with figuring out a way to mount the boom. An ‘ah-ha’ moment struck, and a simple solution was found. My radio desk has a brace under the tabletop in just the right place. I drilled a 5/8″ hole through the tabletop and into the 2×4 brace for a total depth of 2 inches. After vacuuming the shavings out, I pressed a steel sleeve bushing O.D. 5/8″, I.D. 1/2″, Length 1-1/2″ ($3 at the local hardware store) into the hole, creating a flush-mount for the boom to sit in. It works perfectly!
Next was to listen to how I sounded with the existing TX EQ settings in the K3. I had a set of “rotating” TX macros set up to allow me to quickly step through five different TX EQ settings.
After transmitting at 0.1 watts on 10m and listening via another K3 on a distant beverage antenna, I have settled on these as my initial settings for the new microphone:
Yesterday afternoon, I enjoyed many casual QSOs on 17m and 20m using the completely “untethered” accessories. I even experimented with VOX and improved the settings to work effectively with the Shure mic.
And here it is! Boom + Microphone + Mount <$90
Summary: This is a worthwhile purchase and it will enhance my casual operating enjoyment.
I have a 160m Inv-L, feed against 40 buried radials 125 long. The vertical component is parallel to my existing tower, tapering from a wide (~15 ft) space at ground level to a narrow (~4 ft) space at 77 feet above ground, then heading away from the tower for another 40 feet.
I have a very tall (~100 ft) pine tree at the edge of my property, north by northeast from the tower at a distance of 175 feet. I’m thinking of using the pine tree to support the vertical component, and going to an elevated radial system.
This is an interesting read about elevated radials:
Several years ago I acquired an unidentified tilt-over crank-up tower. Manual winches, it appeared to be about 60 feet tall. The deal was take it down and it is yours. So it has sat behind my shop for about 10 years.
Recently, I saw a picture on the internet of an identical tower, and it was identified as an EZ Way, not that it mattered much to me at the time. However, the motorized trailered tilt-over crank-up tower that our club has used for Field Day for many years isn’t available this year. Ah-hah! Now I have a reason to be interested in the EZ Way. Of course, it was designed to be ground mounted. But I have a heavy trailer, and began considering the possibility of mounting the tower, temporarily and safely, on the trailer.
Short story is I reinforced the under frame at the four anchor bolt points for the tower base, and also fabricated a support for the long end of the tower to rest on when in transit.
All attachments to the trailer are bolted, so the installation is easily reversible to return the trailer to normal utility use. The project turned out quite nice!
For FD, I don’t expect to need to crank up to more than 45 feet. Exercising the KISS principle, I’ll install a flat top plate with a 3 ft pipe stubbed up. Then, I can slide the larger diameter mast over it, and rotate it by a pull rope attached to one end of the boom. The antenna will be a KT-34.
Many thanks to Jim W5LA, Mark K5MSB and Shawn WA5VQP for the helping hands on the labor to make this all possible.
In 2020, I removed this tower from the trailer and installed it on a homemade Wonder Post.
01/14/11 — A new (to me) transceiver arrived today! K3 #0251 – I’m looking forwarded to giving it a good workout to evaluate my preference between K3, 756Pro2, and FT1000MP.
12/04/10 — Constructed an Inverted-L for 160 meters. Vertical component is 75 ft and horizontal is 100 ft. It is attached to Tower #1 at the 75 ft standoff, and the horizontal runs due north toward a tall pine tree. It is grounded to the same radial field used for the 80m shunt fed tower.