Please pardon the intrusion. My name is Scott. My call was KD5CAS from August 1997 to November 1999, when I became W5WZ.
I was thinking about my first HF QSOs back in September and October 1997, and wanted to reach out to those 18 hams who patiently endured those QSOs with a brand-new ham only 26 years old. I could barely copy CW at the time, so I’m sure I wasn’t much for conversation. Searching QRZ, only four remain with active licenses and an email address in the QRZ records. So this email is being sent to those four. If you were the person at the other end of one of these QSOs, I’d love to hear from you.
And, if you happen to have notes in your logbook about our QSO, or have my inbound QSL card, I would love to have a digital scan or photo of that to add to my radio history.
I was licensed as a technician plus at the time. The rig was a Kenwood TS-430, and the antenna was a ladder-line feed 132-foot dipole.
I’ve been active on HF continually for the past 25 years. I’ve grown to love DXing and contesting. With lots of help from others, we’ve built a competitive contest station at my home in Louisiana.
Along the way, my wife and all four children earned ham licenses.
I’ve attended the Dayton Hamvention 9 times, and have ham friends all around the world.
I’m grateful for my elmer, W5LA, who is a close friend to this day. And likewise, I’m grateful to you for the QSO in my radio infancy. I wanted you to know that this has been an enjoyable journey, and you each are a part of it.
Thank you so much,
73, Scott, W5WZ (ex KD5CAS)
I was pleased to receive replies via email from two of the four:
Well Hello Scott,
It has certainly been a while. Back when we had our QSO I believe I just upgraded to extra and upgraded from a Kenwood TS-440SAT to a new Icom IC-756. While I had taken a break from the hobby I have upgraded the station over the years. When we had our QSO I was running the Icom 756 with a Cushcraft R-7000 40-10 meter vertical, I no longer have the 756 but I still have the R-7000, the matching network failed a few years ago and is now just a pile of parts. I still have my Astron RS-50M power supply, MFJ-986 tuner and still use my AEA PK-88 that I used to digipeat through the MIR space station, now used through the ISS. My station now consists of two Icom IC-775DSP transceivers, Alpha 76A, Palstar AT-1500CV,(soon to be upgraded to a Palstar AT 4K) MFJ-986, Icom IC-2000, two Heil ICM boom mics, and a Icom IC-9700 all mode VHF/UHF transceiver, soon to be paired with a Icom IC-7300. My primary antennas are a Buckmaster 3kW off center 7 band dipole, an inverted L for 160 and various VHF/UHF antennas. I just purchased a High Gain 640 AV and a Comet GP-95 VHF/UHF vertical but have not installed them yet. I have included a link to my general album that I have posted both of the QSL cards I received form you and the current state of my HAM / Test and measurement shack. https://photos.app.goo.gl/gksC6mUmF7UaUMz27
QSL cards sent by me to N7UQA for my 10th and 155th QSOs ever
73 and thanks for the links.
Craig Petersen – N7UQA
Thanks for your email. congrats.. I was 37 then..
62 now still working with new cw ops. Just helped a guy on 20 cw today.
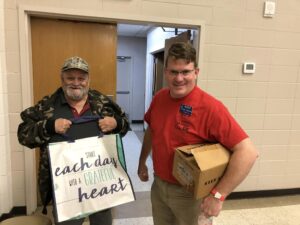
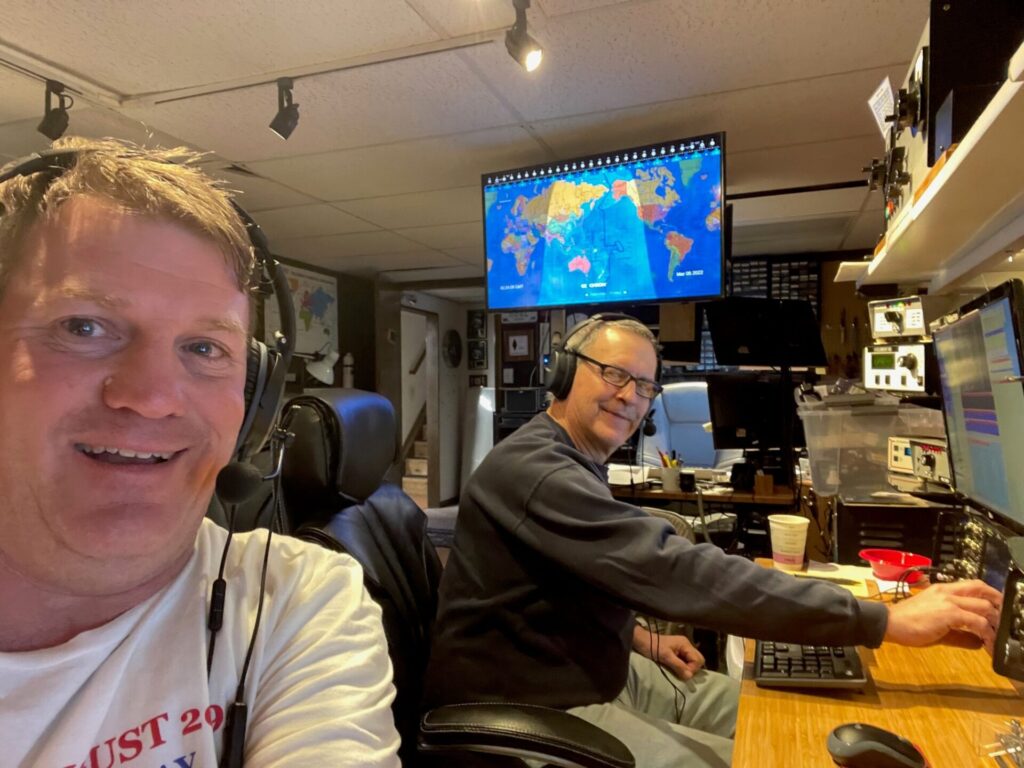
12/17/2022 – the weather was forecast to be cool, but sunny. WM5H and I drove over to Minden, Louisiana to the MARA Annual Christmas Hamfest. We got to see some friends and swap some good stories.
WM5H and W5WZ at MARA hamfest
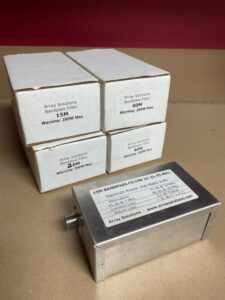
In the swap tables area, I bought a set of Array Solutions band pass filters for a fair price.
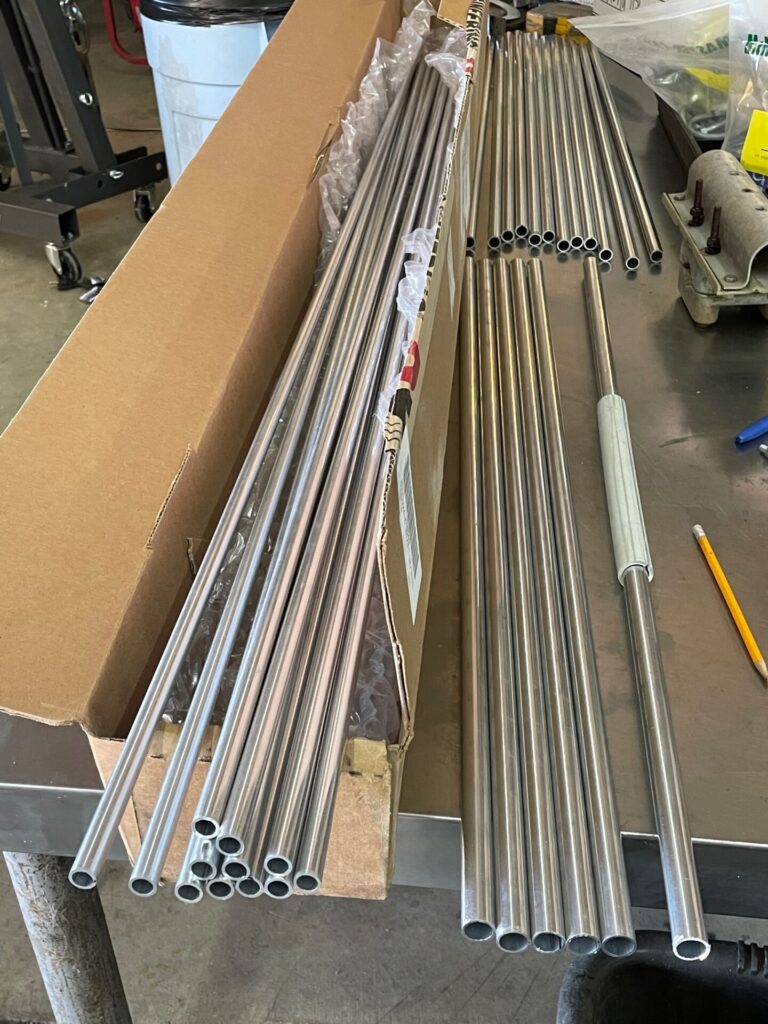
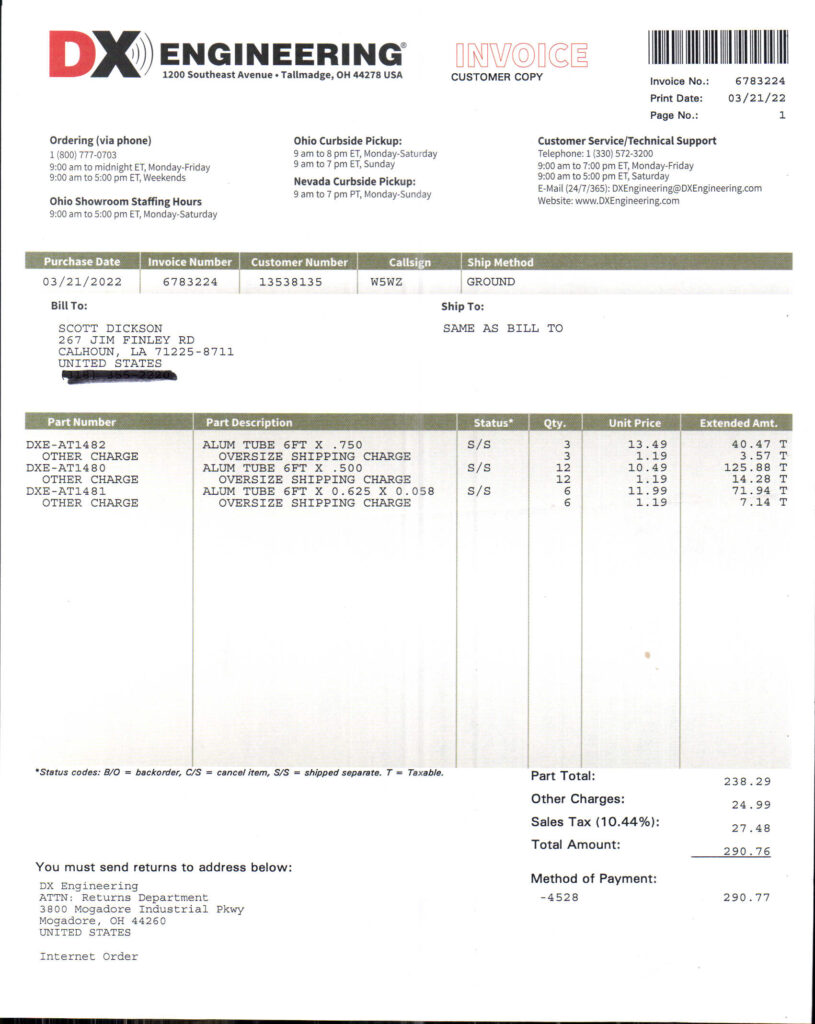
3/27/2022 – With a box of shiny tubing from DXE, and an OWA design from my friend, I tackled an antenna construction project today.
Shiny tubing for tower bling!
Since selling my Lightning Bolt 2-element 5-band cubical quad a few years ago, I have not had an antenna for 12 meters. My DXCC count is low on that band, so I figured that with the uptick in propagation, now is as good a time as any to tackle this project.
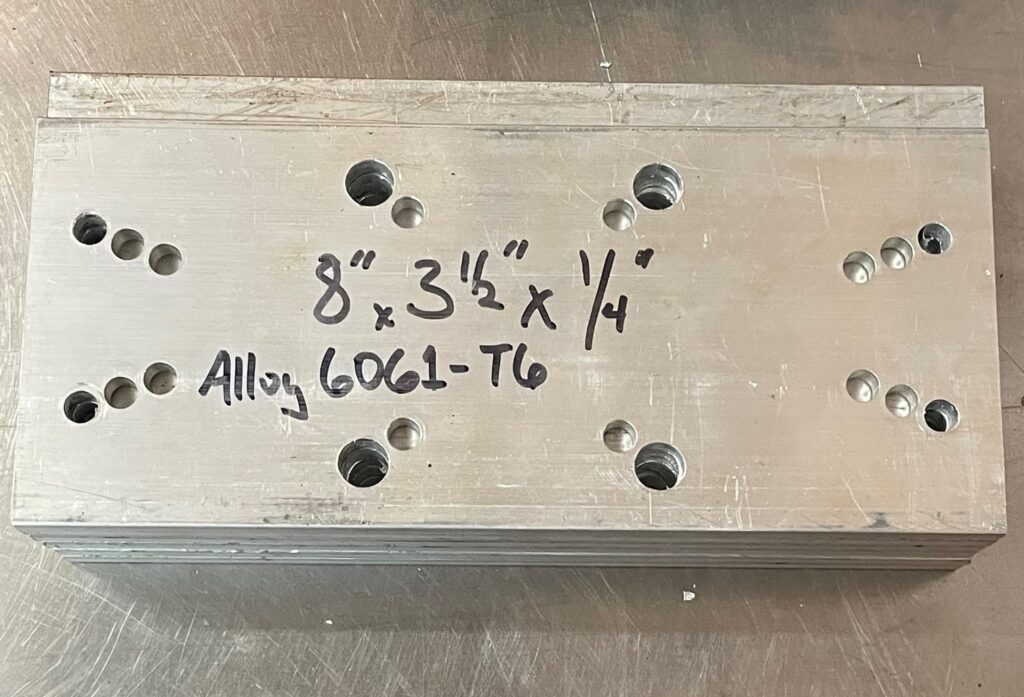
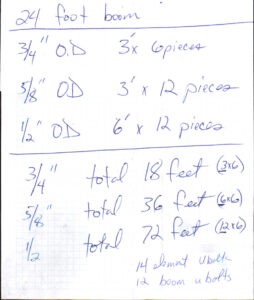
Some time ago I asked around for an OWA design to use a 24-foot boom (salvaged from an old TH6?). Once I had the design in hand, I plugged it into EZNEC 6.0, and agreed with the designer’s conclusions. Download my EZNEC file for this antenna. I made a parts list and placed an order from DXE for the tubing (surely there are others suppliers around, but I can’t find them using Google search) and another from McMaster-Carr for the hardware needed.
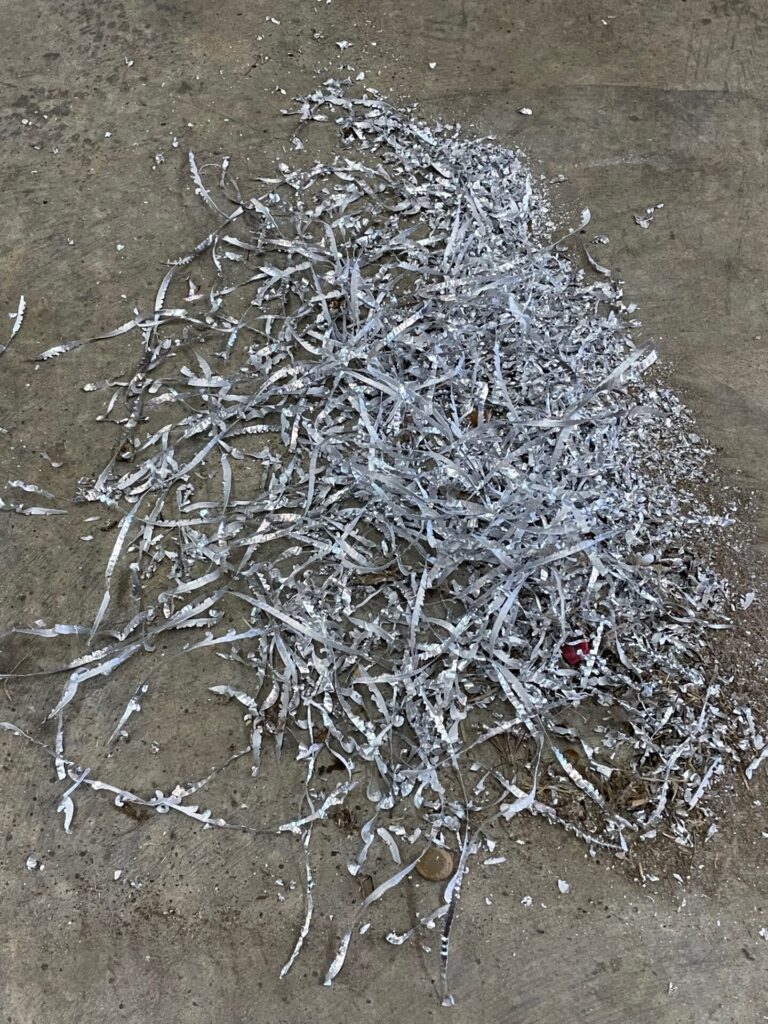
With some aluminum flat bar cut to length, a drill press made quick work punching holes in the boom-to-element plates (I used a DXE model as a template).
A pile of shavings!
Stack of six boom-to-element plates
The Sawzall was employed to cut the tubing to the needed lengths, followed by a thorough deburring of all tubing ends. Measured and marked the “exposed” lengths of tubing, inserted to the marks, and drilled three 1/8″ holes for pop rivets. Pulled the tubing out, deburred the drilled holes, then coated the insertable tip with a copper-impregnated anti-seize compound. Aligned the holes and riveted the tubing together. The halves of the driven element are separated by 2-inches, supported by a 0.75″ fiberglass rod inserted into both halves.
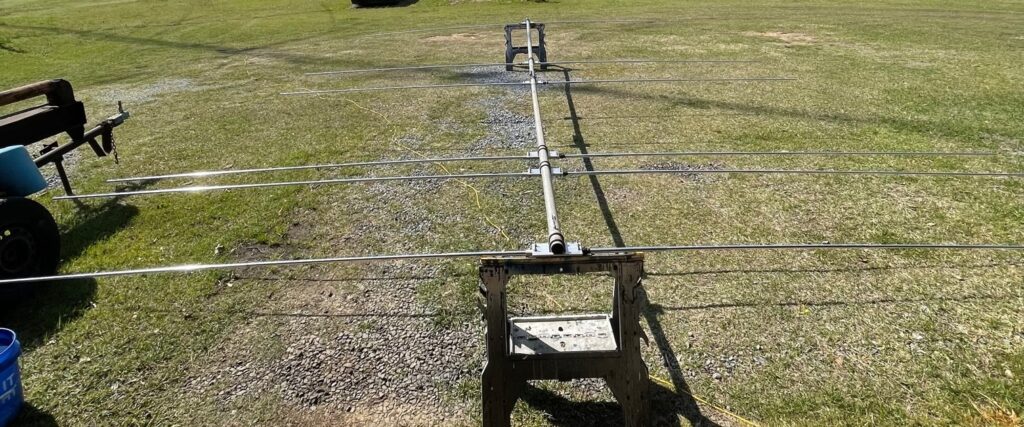
With the elements assembled, I moved outdoors to assemble the boom and install the boom-to-element plates. After that, installing the elements was a piece of cake.
This perspective doesn’t present the antenna well
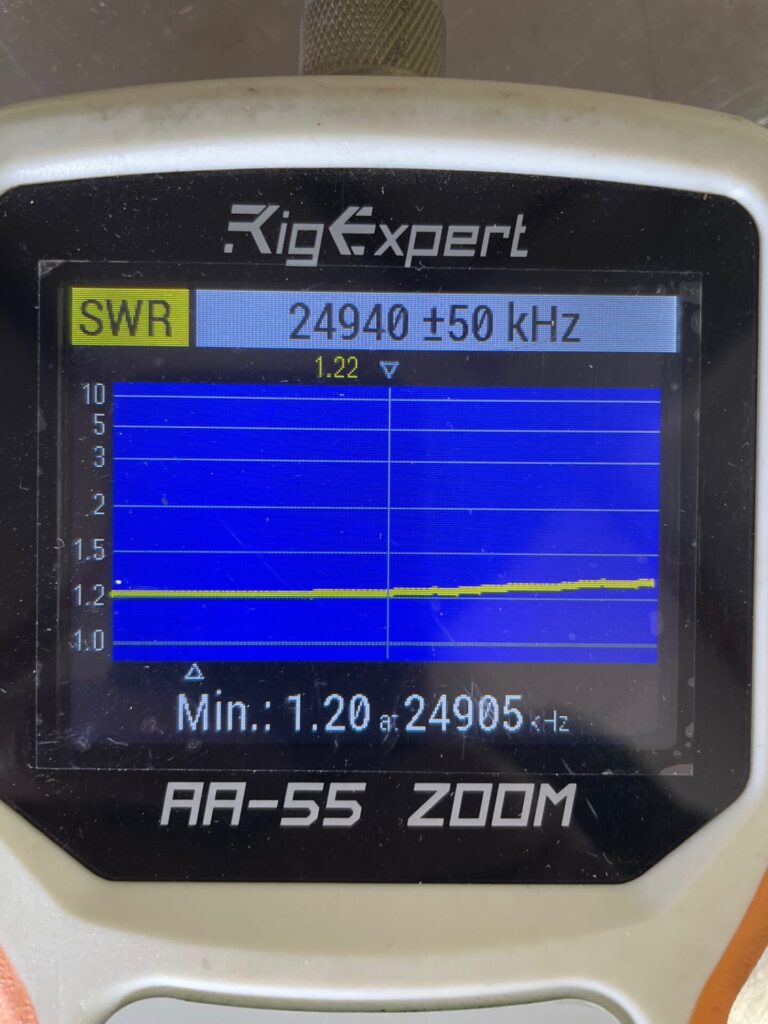
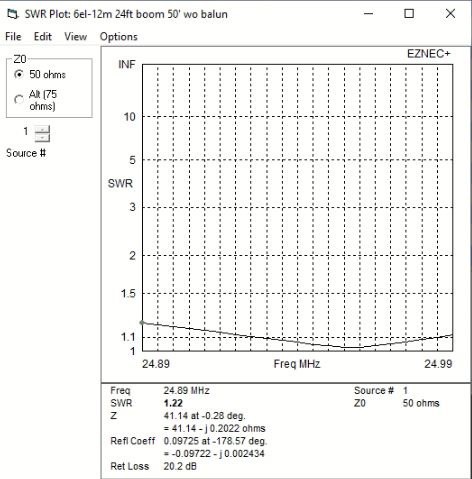
Still sitting on sawhorses, the initial SWR and R,X sweeps are nearly identical to the EZNEC model, and this is direct-feed.
Initial sweep still sitting on sawhorsesEZNEC 6.0 model’s SWR curve
I’ll update this post when the antenna is in service. I think it is going to be a flamethrower!
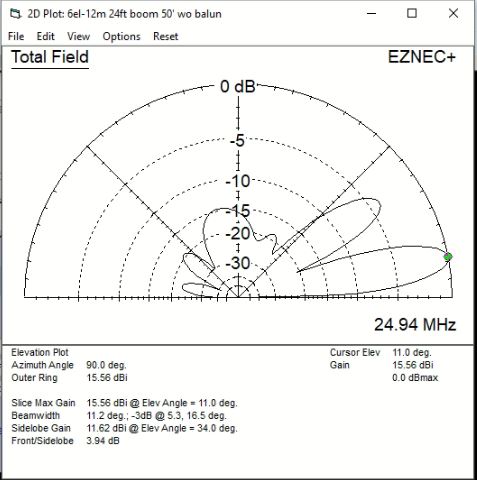
EZNEC 6.0 modeled pattern
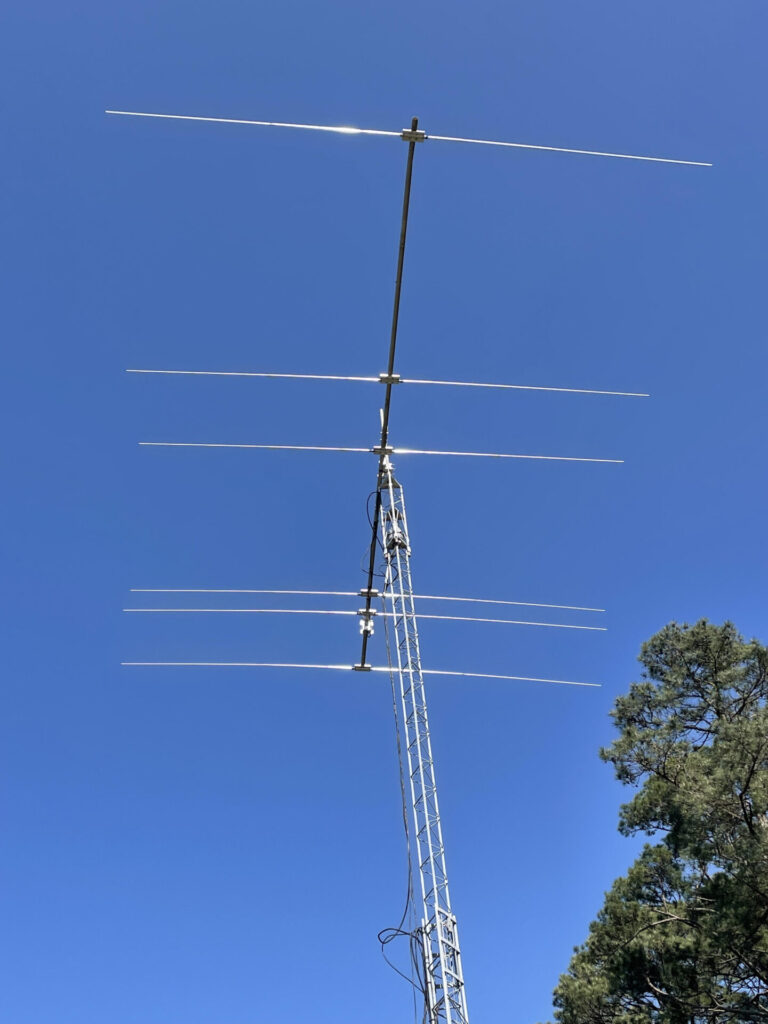
4/15/2022 – Good Friday, and good Friday! I was off work. Woke up at 0400 and was wide-awake. Decided today was a good day to install the antenna. So, working alone with tractor and pallet forks, along with an 8-foot ladder, I was able to remove the KT-34 and install the 12-meter yagi. Initial tests are promising – worked YV4 and VP2V right away, 100 watts CW.
4/15/22 – 12-meter yagi now flying at 50 feet
A comparable commercially build yagi is the M2 12M4DX which is priced at $1,908.95.
The parts list
I used a Balun Designs Model 1115t – 1:1 Isolation – Suppression Balun at the feed point, cost to my door about $65.
Aluminum isn’t cheap, but this beats buying a commercially built antenna
This past weekend (Thursday, March 3 to Monday, March 7) was a road trip of 2,200 miles. I drove up to K8AZ for my 9th time as a guest operator for a major DX SSB contest.
As always, I thoroughly enjoy being with Tom and the ‘AZ Crew. Tom has built a fantastic station, and every time I go, there has been an improvement since my previous visit.
During the drive home, I was reflecting on these trips to K8AZ and how many other hams I’ve enjoyed the camaraderie with while there. I’ve shared shack time with 21 hams at the ‘AZ station: AA8OY K3LA K3LEA K8AAV K8AZ K8BL K8MR K8NZ K8RR KE3X N5OT N8AA N8TR ND8L W3YQ W5WZ W8CAR W8WTS W8WWV WB8K WT8C. Lots of fun and memories!
All of the scores are posted on 3830scores.com, just use the search in the top right of the 3830 page.
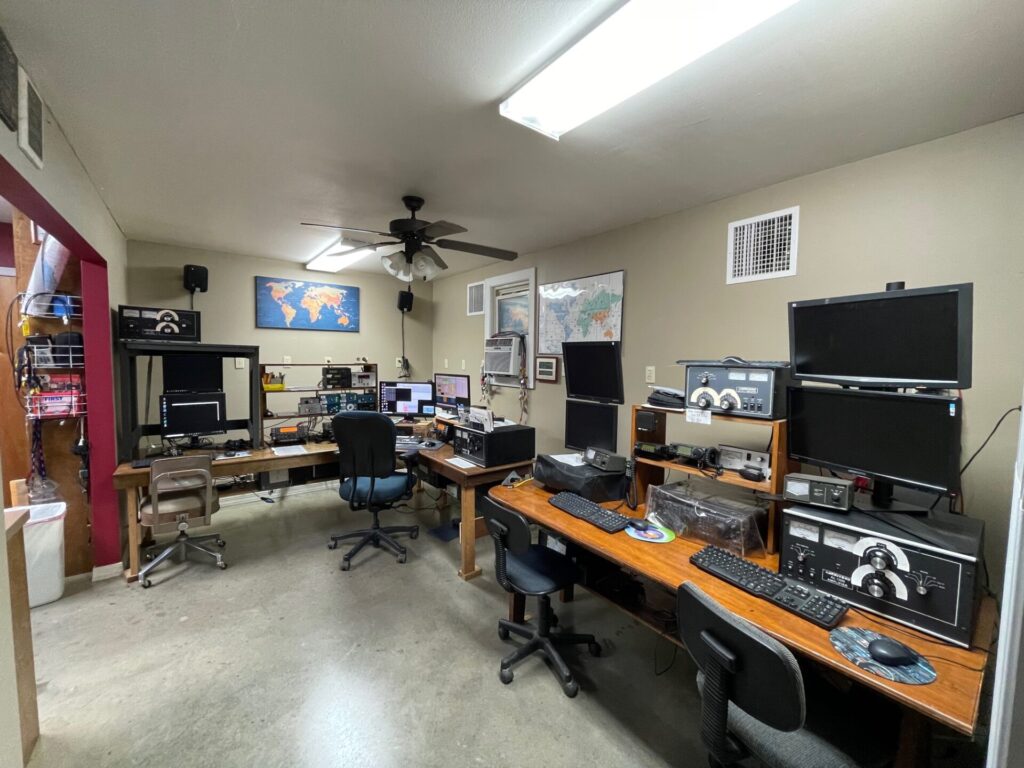
Keeping your butt in the chair is an important part of contesting. Sometimes the chair is the source of discomfort that leads to diminished BIC time. The chairs in my shack were a mixture of cheap and hand-me-down office task chairs that were not very comfortable.
Mixture of chairs – 3 very cheap task chairs and one moderate quality chair that I selfishly always use.
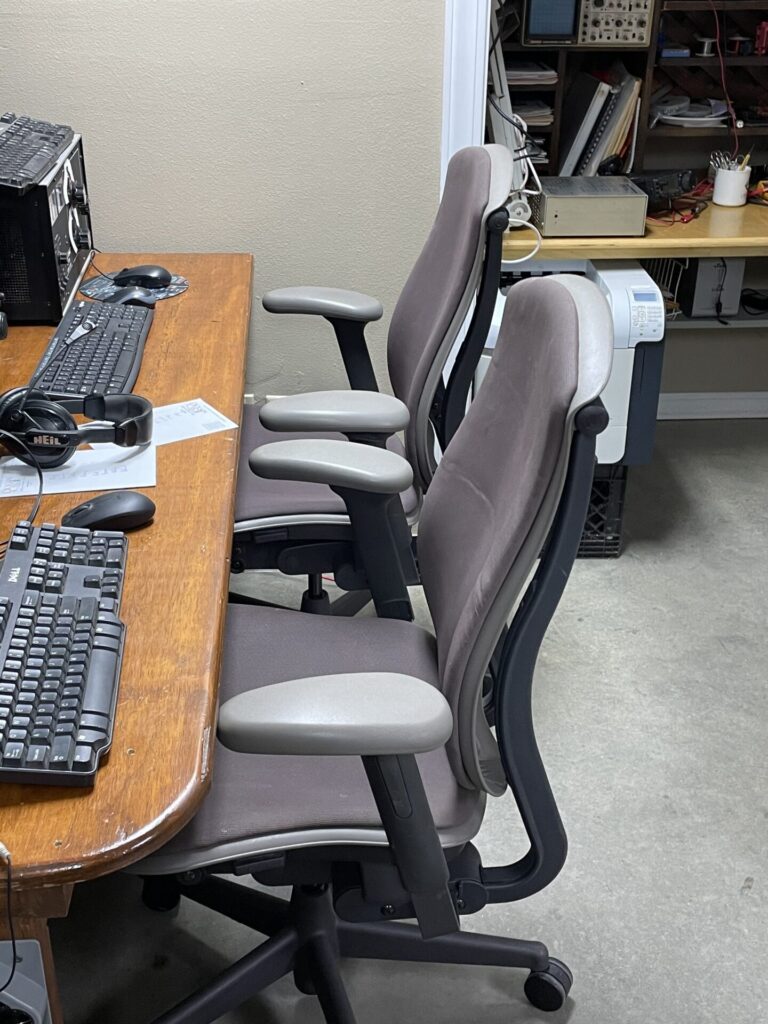
Yesterday my wife KW5MOM and I were shopping for a new bed for the guest bedroom. I saw some used chairs in the corner and asked about them. The proprietor told me they were $50 each. So I made a deal for five of the Herman Miller chairs.
A pair of the five “new-to-me” Herman Miller chairs, which are highly adjustable.
I hope my shack guests will find them more comfortable. At the very least, all the chairs are the same now.
If you have thoughts or experiences regarding chairs for the contest station, please comment below!
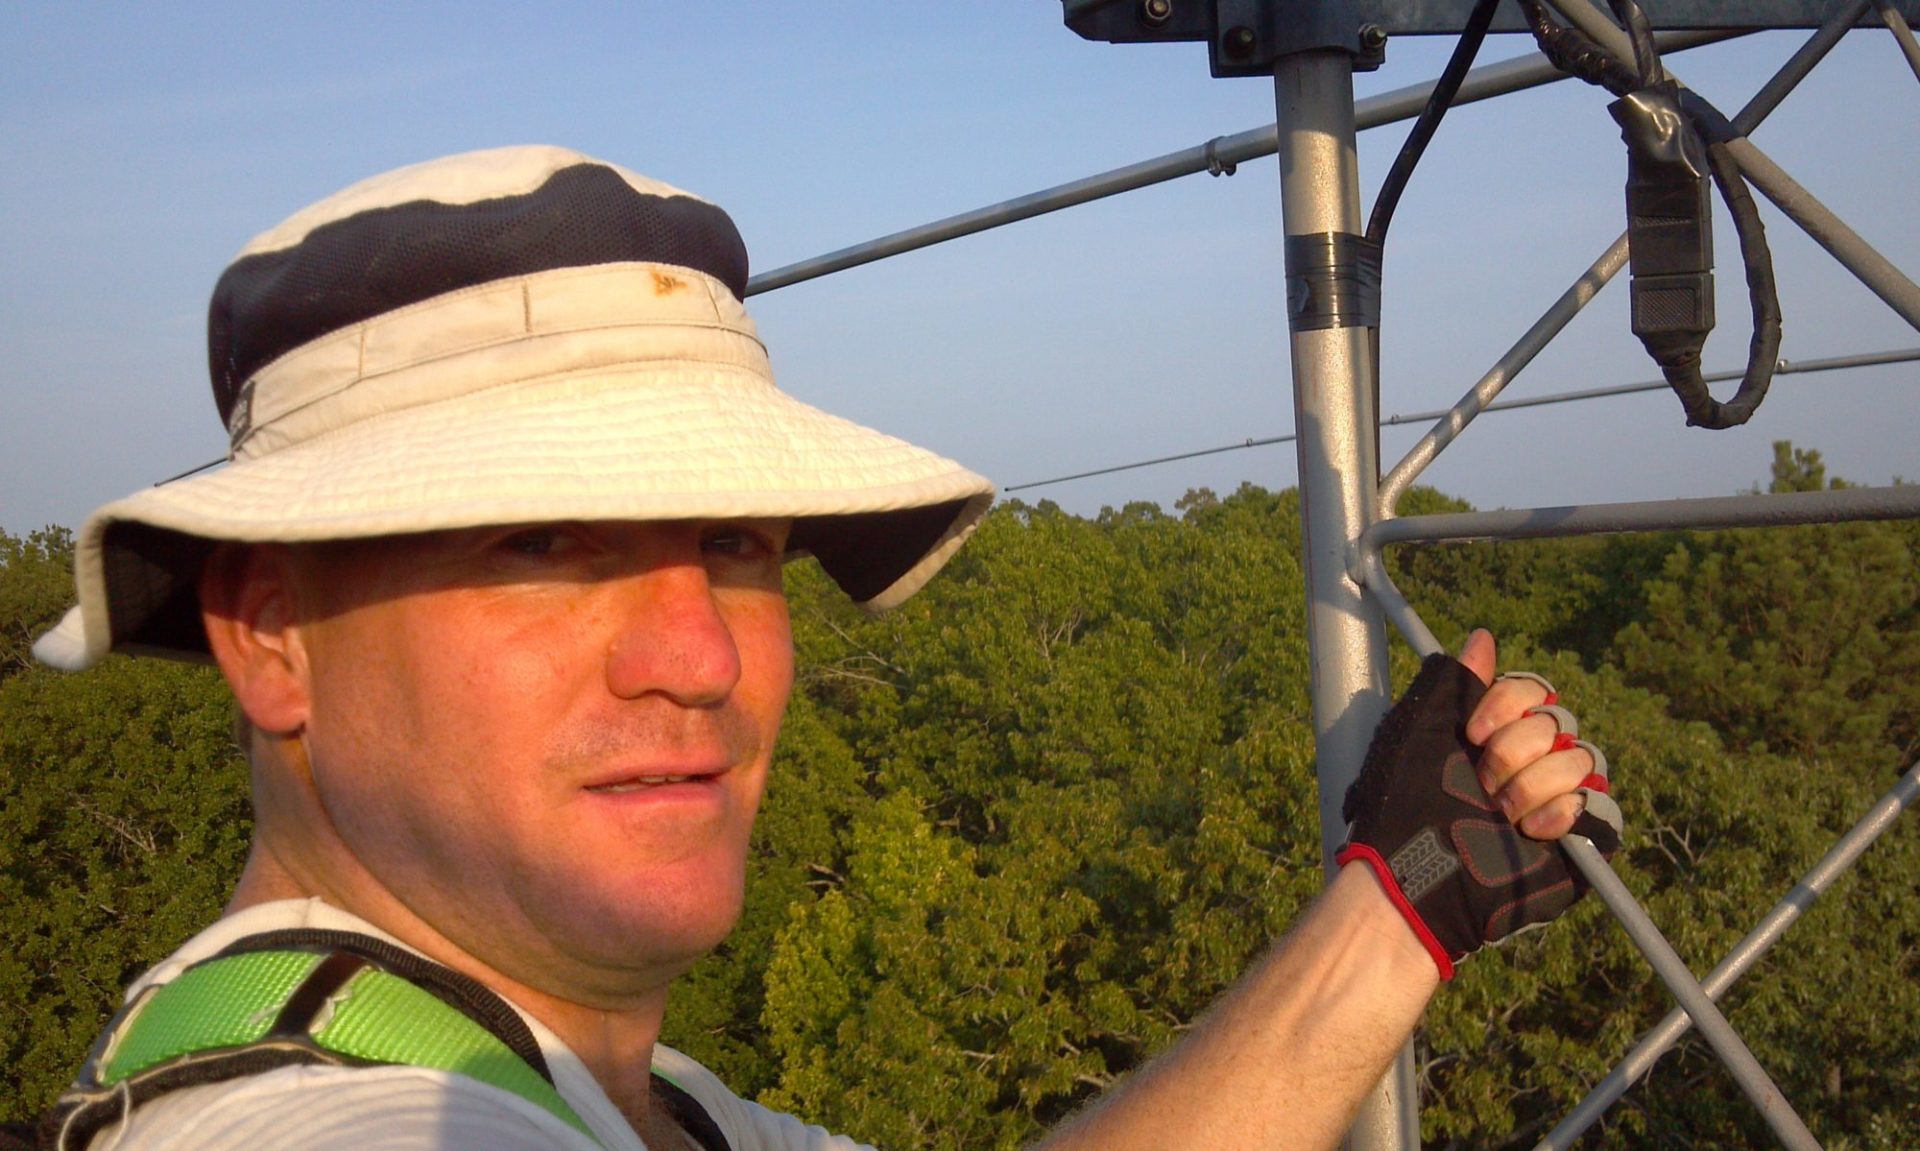
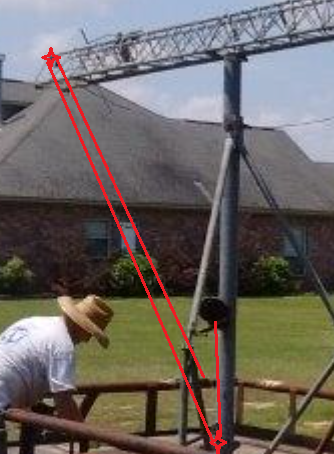
All tower owners should regularly inspect their complete tower system – guys, guy anchors, guy wires, tower base, section bolts, turnbuckles, etc – the complete tower system. Before I climb, I visually check all I can see. When I climb, I check section bolts. And about once a year, I check guy tension and adjust as needed.
10 Feb 2021
NW Guy
NE Guy
S Guy
Top 1/4″
29
29
28
Mid 3/16″
19
18
18
Bottom 3/16″
20
20
19
Using Loos Model PT-2, I adjusted my guys to these tensions
This process led to me emailing Tim W3YQ to ask his thoughts. Here is the reply:
Well, here’s my thoughts. Plumb is much more important than guy wire tension – within reason. To have a tower in plumb, the whole structure is in compression. It won’t fail. Just like a pencil – you can’t smash it with a downward force, but you can snap it by bending it in the middle.
I know of only two ways to plumb a tower. The first, best, and easiest is to set up two transits; 90 degrees apart. Sight both transits to the bottom of the tower then move up to the first guy level. Get the tower straight up to that point. I usually use the width of a Rohn tower leg as my “good enough” standard. If the tower’s way out of plumb, you might have to mess with the other two sets of guy wires simultaneously. Sometimes it’s really hard to pull that first guy wire set in when the rest of the tower is fighting you. Once the lowest set of guys is done, move up to the next set.
The tension of the three guy wires of any level will (almost) never be equal. The only time that would occur is if you were on a perfectly flat plane and your guy anchor points are exactly on the money. Theoretical but not practical. Someone who adjusts all three guy wires to equal tension almost certainly have a crocked tower. Don’t worry about guy tension. Go for plumb. Use the tension gauge to help you get things set “close” to the suggested tensions. Err on the side of loose instead of tight. That 10% rule is a guideline and it’s purpose is to prevent the guy wires from galloping. They’ll do that in the wind if they’re much too loose. Loose guy wires, again within reason, exert less force on the structure. Yes, when you climb, there will be a little more movement with loose guy wires, but the tower is not going to fall over. Too tight, on the other hand, is exerting an extreme downward force on the tower. True that if you’re perfectly in plumb it won’t collapse, but why go there. So just use your Loos gauge as a guide. Never go above the 10% value on any guy wire, but try to get close to that value on the one that needs the most tension. Then adjust the other two guy wires for plumb and not tension. I usually check the tension of all three and I generally find that they’re way off from each other. That’s OK.
The second method: It IS possible to plumb by attaching a small rope at each guy level, one at a time. Center it in tower, hang it down through the middle of the tower, and attach a weight at the bottom. Then stick a bucket of water for the weight to rest in. I guess you call that a plumb bob. The water keeps the weighted rope from swinging. It’s kind of a PITA, but it works.
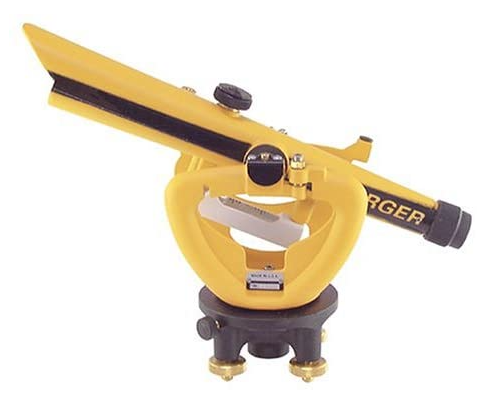
So, this led to me purchasing a transit and acquiring another to be able to properly do “Method One” above. Once all the components arrive, I’ll post an update on the project.
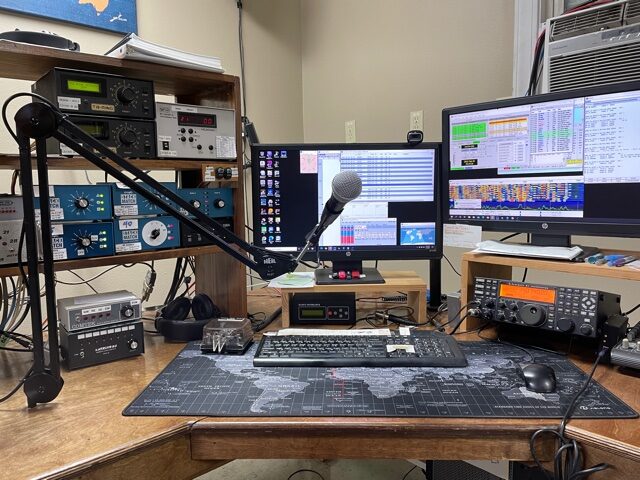
A year ago I wrote about my Christmas 2018 “self-gift”, the pair of JBL Control 2P powered monitor speakers that I integrated into my shack with a Mackie 1202-VLZ Pro. This continues to be enjoyed in my shack because I can listen to multiple sources without being tethered by a headset cord.
Similarly, I’ve been tethered by headset cord to all my microphones because they are all headset mikes. For some time, I had desired an articulating boom + microphone setup. However, I did not want to pay for brand new equipment just to try something out, and I wasn’t really sure how or where I would mount it to not be in the way when not using it.
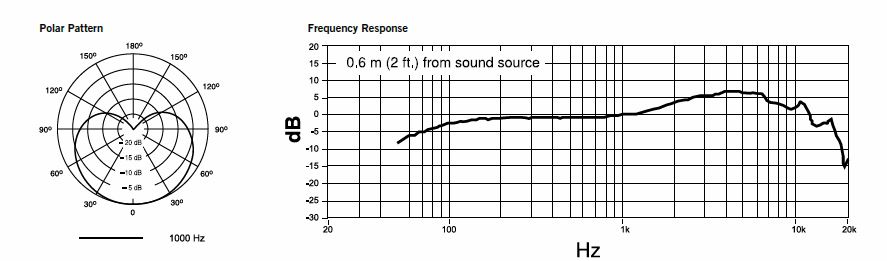
I had read on the Elecraft reflector some interesting commentary about brands of microphones. As the K3 has a built-in transmit equalizer, it seemed the consensus leaned away from the brand that is marketed as the elite microphones for ham radio. I studied some other brands and the frequency response and cardioid patterns of several microphones.
Shure PGA 48 response charts
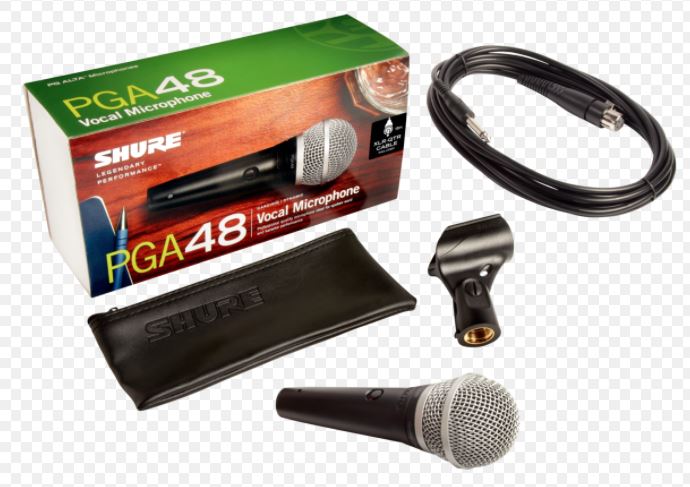
Soon, I found one that I was willing to buy and try. I found a new condition, open box Shure PGA48 with a 15-ft XLR cable and mic clip on eBay for $33 to my door.
What’s in the box.
At the same time on eBay, I found a used mic boom, Heil PL2 missing the cable covers and any type of mount, for $50 to my door. Tiny zip ties will hold the cable just fine.
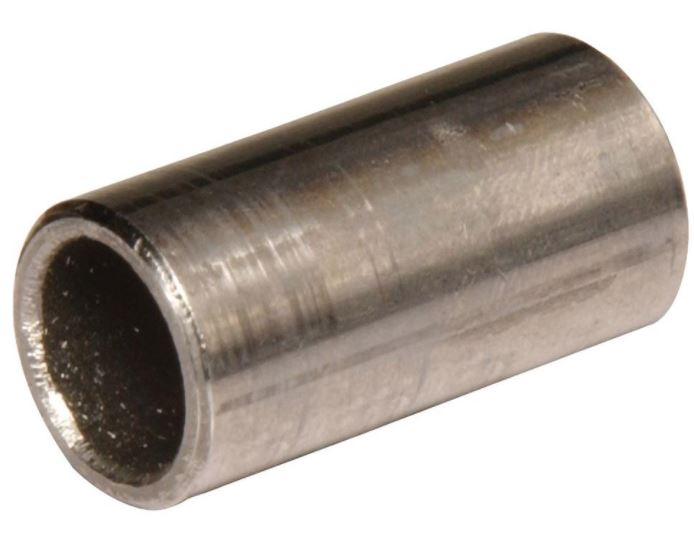
The items arrived, and I was left with figuring out a way to mount the boom. An ‘ah-ha’ moment struck, and a simple solution was found. My radio desk has a brace under the tabletop in just the right place. I drilled a 5/8″ hole through the tabletop and into the 2×4 brace for a total depth of 2 inches. After vacuuming the shavings out, I pressed a steel sleeve bushing O.D. 5/8″, I.D. 1/2″, Length 1-1/2″ ($3 at the local hardware store) into the hole, creating a flush-mount for the boom to sit in. It works perfectly!
Next was to listen to how I sounded with the existing TX EQ settings in the K3. I had a set of “rotating” TX macros set up to allow me to quickly step through five different TX EQ settings.
After transmitting at 0.1 watts on 10m and listening via another K3 on a distant beverage antenna, I have settled on these as my initial settings for the new microphone:
Yesterday afternoon, I enjoyed many casual QSOs on 17m and 20m using the completely “untethered” accessories. I even experimented with VOX and improved the settings to work effectively with the Shure mic.
And here it is! Boom + Microphone + Mount <$90
Summary: This is a worthwhile purchase and it will enhance my casual operating enjoyment.
Added two new beverage receive antennae – southeast and southwest.
Southeast is 580 feet long.
Southwest is 480 feet long.
Installed them both 2 feet above the existing beverages for NE and NW using PVC pipe as a vertical standoff.
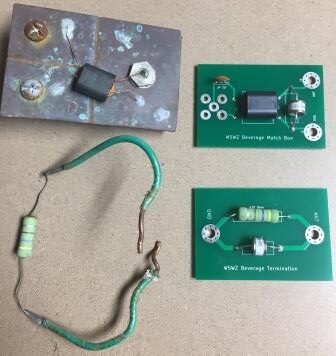
Improved beverage transformer and terminations by having printed circuit boards made, and placing them inside enclosures, rather than leaving them exposed to the weather. Gas discharge tubes to help protect from surges due to lightning strikes. DC blocking capacitor is also included on the feed point. Thanks to Steve, VE6WZ for the inspiring YouTube video, along with the KiCad files to get started!
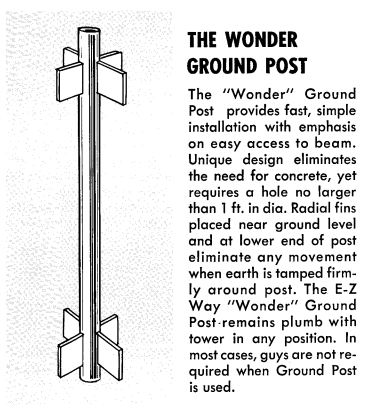
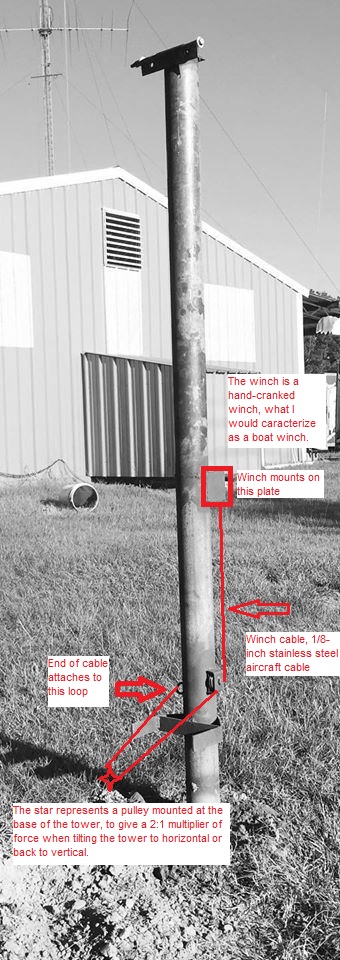
Built a home-brew EZ-Way Wonder Post to ground-mount the EZ-Way Tower that had been on my utility trailer as a portable tower. This 50-foot tower will be used for 6 meters, 2 meters, and 70 centimeters. I rebuilt a Ham-II rotator for this project.
From the EZ Way brochureHome-brew EZ Way Wonder Post, using 6-inch diameter Schedule 40 galvanized pipe. Five feet of pipe is in the ground, with vanes at the bottom and just below ground level. Cable routing for the tilting function
6-meter antenna is a Hygain VB-66DX – 6 elements on a 24-foot boom.
Don’t yet know what will go up for 2m and 70cm.
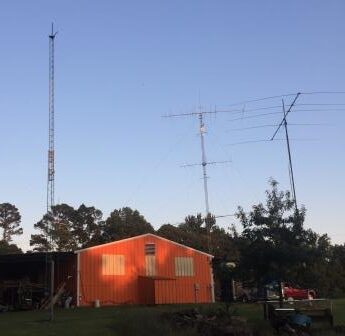
Freshly installed EZ-Way tower on the left. On the right is the home-brew tilt-over tower, 45 feet tall with 5 elements on a 30-foot boom for 17 meters. At the center, 225 feet away from the camera is Tower #1.
And a good time was had by all. 12 hours B.I.C. We had trouble with the SixPack with 15, 20, and 40 meters. Had to coax jump around the SixPack to use 15 and 40 on the right radio. No time to fix during the contest!
Thanks to all for the QSOs, and especially all the >3 band QSOs.